What to Take to Beat Valguero Boss Easy
Main Storyline Progression [ ]
On The Island, there are four Arenas for fighting the game's Bosses: ![]() Broodmother Lysrix,
Broodmother Lysrix, ![]() Megapithecus,
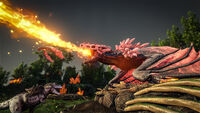
Megapithecus, ![]() Dragon, and finally the
Dragon, and finally the ![]() Overseer.
Overseer.
-
Broodmother Arena
-
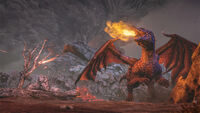
Dragon Arena
-
Megapithecus Arena
-
Overseer Arena
DLC Arenas [ ]
Main Storyline Progression [ ]
These arenas in this section follows the main storyline for the entirety of ARK:
The Rockwell Arena is featured in the DLC: Aberration where survivors must defeat ![]() Rockwell.
Rockwell.
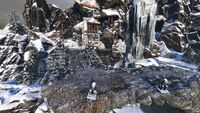
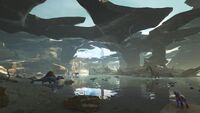
The King Titan Arena, Desert Titan Arena, Ice Titan Arena, and Forest Titan Arena are featured in the DLC: Extinction as part of the map rather than a separate section. All of the bosses (Titan) summoned are within the map, rather than being found in their own Arenas.
The Moeder Arena is featured in DLC: Genesis: Part 1 where Moeder, Master of the Ocean resides during the mission.
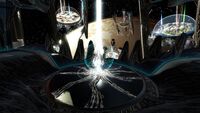
The VR is featured in DLC: Genesis: Part 1 where Corrupted Master Controller resides. Survivors must have cleared enough mission to trigger the fight through HLN-A.
The Terminus is featured in DLC: Genesis: Part 2 where the now mutated Edmund Rockwell resides. Survivors must have cleared all missions of corresponding difficulty in the ship to join and/or trigger the fight underneath Rockwell's Proliferation (Genesis: Part 2) mission terminal. This is the last canon boss before ARK 2 takes place.
-
Rockwell Arena
-
Desert Titan Arena
-
Ice Titan Arena
-
Forest Titan Arena
-
King Titan Arena
-
Moeder Arena
-

System Root
-
Terminus
Non-Storyline Progression [ ]
These arenas in this section does not follow the main storyline for the entirety of ARK:
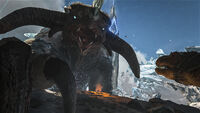
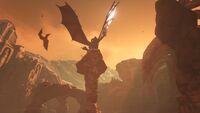
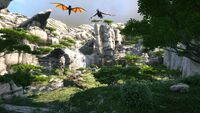
The Manticore Arena is featured in the DLC: Scorched Earth where survivors must defeat the ![]() Manticore.
Manticore.
The Center features an arena where both ![]() Broodmother and
Broodmother and ![]() Megapithecus must be defeated at the same time. Likewise, Ragnarok features an arena where both the
Megapithecus must be defeated at the same time. Likewise, Ragnarok features an arena where both the ![]() Manticore and the
Manticore and the ![]() Dragon must also be defeated together.
Dragon must also be defeated together.
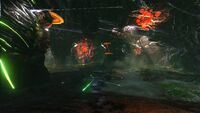
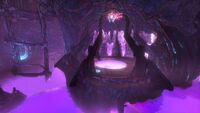
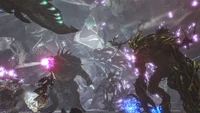
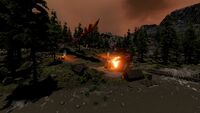
The Forsaken Oasis is a boss arena featured in the DLC: Valguero where survivors must deal with ![]() Megapithecus,
Megapithecus, ![]() Manticore and
Manticore and ![]() Dragon. There is a separate arena of fighting against
Dragon. There is a separate arena of fighting against ![]() Broodmother as well.
Broodmother as well.
-
Manticore Arena
-

The Center Arena
-
Ragnarok Arena
-
Forsaken Oasis
-
Crystal Wyvern Queen Arena
-
Ancient Proving Grounds
Location [ ]
The Broodmother, Megapithecus, and Dragon Arenas are located under each of the three Obelisks. To reach these locations, players must go to either a Supply Crate or Obelisk and place the required tribute items inside, then click on the ![]() Generate Broodmother Portal,
Generate Broodmother Portal, ![]() Generate Megapithecus Portal, or
Generate Megapithecus Portal, or ![]() Generate Dragon Portal items. At this point a portal will be opened to teleport nearby players and dinos into the arena.
Generate Dragon Portal items. At this point a portal will be opened to teleport nearby players and dinos into the arena.
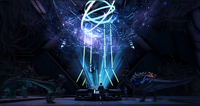
The Overseer Arena is accessible by completing the Tek Cave in the Volcano's caldera and teleporting to the Observation Deck.
Total Tribute [ ]
| Bosses | Gamma | Beta | Alpha |
|---|---|---|---|
| | 10 | 50 | 70 |
| | 45 | 65 | 85 |
| | 55 | 75 | 100 |
| | 55 | 70 | 95 |
| The Center's Guardians | 70 | 80 | 90 |
| Ragnarok's Guardians | 70 | 80 | 90 |
| Valguero's Guardians | 30 | 30 | 70 |
| | 60 | 75 | 100 |
| | 1 | ||
| | 1 | ||
| | 1 | ||
| | 1 | 1 | 1 |
| | 1 | 1 | 1 |
| | 1 | 1 | 1 |
| | 1 | 1 | 1 |
Tribute Requirements [ ]
Normal [ ]
Genesis [ ]
| Bosses | Gamma | Beta | Alpha |
|---|---|---|---|
| Moeder, Master of the Ocean | N/A | N/A | N/A |
| System Root (Genesis: Part 1) | 58 Mission | 116 Mission | 168 Mission |
| Terminus (Genesis: Part 2) | All Gamma+ Mission | All Beta+ Mission | All Alpha Mission |
Much like the level requirement to join in at normal boss arena, all survivors must have cleared all mission of said difficulty to be able to join in on the fight in Terminus for Genesis: Part 2.
Rewards [ ]
Harder difficulties in a particular boss will award the engrams from all previous difficulties.
2Ragnarok Arena contains ![]() Manticore and
Manticore and ![]() Dragon, which give their Tekgrams upon death. Defeating both unlocks the exclusive Tekgram listed.
Dragon, which give their Tekgrams upon death. Defeating both unlocks the exclusive Tekgram listed.
3 This is the level required to enter the Easy Arena for ![]() Broodmother Lysrix, the lowest level arena.
Broodmother Lysrix, the lowest level arena.
Compatible Tamed Creatures [ ]
These restrictions do not apply to Extinction arena as the boss fight takes place inside the map rather than in a separate section of the map
Entry Restriction:
- A maximum of 10 survivors and 20 creatures are allowed to enter the arena. In the case of Tek Cave, a maximum of 10 survivors and 40 creatures are allowed, but only 20 creatures can be warped in at any point of time to the arena itself per warp.
- Most Arenas restrict survivors to ground-only creature. There are a few exceptions:
- Exceptions for certain arenas are only valid for the listed arenas. E.g. Manticore Arena refers to the Manticore Arena in Scorched Earth but not Ragnarok Arena where you also have to fight against the Manticore.
- A creature's "drag weight" must be less than 560. This is how much the creature itself weighs, not its carrying weight seen in its inventory.
- To see this value in-game, place the creature on an
 Elevator Platform with an empty inventory and no saddle.
| Creature | Accessible | Drag Weight | Rideable | Notes |
|---|---|---|---|---|
| | Yes | 50 | No | |
| | Yes | 285 | Yes | |
| | Yes | 160 | Yes | |
| | Yes | 90 | Yes | |
| | Yes | 50 | No | |
| | Yes/No | 150 | Yes |
|
| | Yes | 110 | Yes | |
| | No | 4000 | Yes | |
| | Yes | 425 | Yes | |
| | Yes | |||
| | Yes/No | 12000 | Yes |
|
| | Yes | 210 | Yes | |
| | Yes | 110 | Yes | |
| | Yes | 30 | No | |
| | No | 1000 | Yes | |
| | Yes | 250 | Yes | |
| | Yes | 250 | Yes | |
| | Yes | 120 | Yes | |
| | Yes | 300 | Yes | |
| | Yes | 20 | No | |
| | Yes/No | 416 | Yes |
|
| | Yes | 120 | Yes | |
| | Yes | 85 | Yes | |
| | Yes | 35 | No | |
| | Yes | 170 | No | |
| | Yes/No | 70 | No |
|
| | Yes | 35 | Yes |
|
| | No | 575 | Yes | |
| | Yes | 295 | Yes | |
| | Yes | 120 | Yes | |
| | Yes | 25 | No | |
| | No | 1000 | Yes | |
| | Yes | 160 | Yes | |
| | Yes | 90 | No | |
| | Yes | 125 | Yes | |
| | No | 35 | Yes | |
| | Yes | 25 | Yes | |
| | Yes | 300 | Yes | |
| | Yes/No | 25 | No |
|
| | Yes | 350 | Yes | |
| | Yes | 410 | Yes | |
| | No | 300 | Yes | |
| | No | 950 | Yes | |
| | Yes | 150 | Yes | |
| | Yes | 25 | No | |
| | Yes/No | 120 | No |
|
| | Yes/No | 75 | Yes |
|
| | Yes | 125 | Yes | |
| | Yes | 25 | No | |
| | Yes | 35 | No | |
| | Yes | 450 | Yes | |
| | Yes | 410.23 | Yes | |
| | Yes | 250 | No | |
| | Yes/No | 149 | Yes |
|
| | Yes | 25 | No | |
| | Yes | 400 | Yes | |
| | ?? | 550 | Yes | |
| | Yes | 250 | Yes | |
| | Yes | 200 | Yes | |
| | No | 3000 | Yes | |
| | Yes/No | 35 | Yes |
|
| | Yes | 120 | Yes | |
| | Yes/No | 250 | Yes |
|
| | Yes | 410 | Yes | |
| | Yes | 295 | Yes | |
| | No | 1200 | Yes | |
| | No | 1200 | Yes |
|
| | Yes | 25 | No | |
| | Yes | 35 | No | |
| | Yes | 300 | Yes | |
| | Yes/No | 899 | Yes |
|
| | Yes | 95 | Yes | |
| | Yes/No | 35 | No |
|
| | Yes | 35 | No | |
| | Yes | 40 | No | |
| | Yes | 85 | Yes | |
| | Yes | 85 | Yes | |
| | Yes | 200 | Yes | |
| | No | 600 | Yes | |
| | Yes | 125 | Yes | |
| | Yes | 20 | No | |
| | Yes/No | 120 | Yes |
|
| | Yes | 120 | Yes | |
| | Yes/No | 35 | Yes |
|
| | Yes | 410 | Yes | |
| | Yes/No | 149 | Yes |
|
| | Yes | 300 | No | |
| | Yes/No | 500 | Yes |
|
| | Yes | 85 | Yes | |
| | Yes | 120 | Yes | |
| | Yes | 525 | Yes | |
| | Yes | 550 | Yes | |
| | Yes/No | 425 | Yes |
|
| | No | 1000 | Yes | |
| | Yes | 245 | Yes | |
| | Yes | 120 | Yes | |
| | Yes | 200 | Yes | |
| | Yes | 110 | Yes | |
| | No | 149 | No | |
| | Yes | 25 | No | |
| | Yes/No | 35 | Yes |
|
| | Yes | 550 | Yes | |
| | Yes | 250 | Yes | |
| | Yes/No | 149 | Yes |
|
| | Yes | 85 | Yes | |
| | Yes | 250 | Yes | |
| | Yes | 150 | Yes | |
| | Yes/No | 180 | Yes |
|
| | No | 110 | ||
| | No | 3000 | Yes | |
| | No | 35 | Yes | |
| | No | 6000 | Yes | |
| | No | 35 | Yes | |
| | Yes | 300 | Yes | |
| | Yes | 35 | No | |
| | Yes/No | 1500 | Yes |
|
| | Yes | 125 | Yes | |
| | Yes | 70 | No | |
| | Yes | 200 | Yes | |
| | Yes | 375 | Yes | |
| | Yes/No | 416 | Yes |
|
Notes [ ]
Entering / Leaving the Arena [ ]
Others [ ]
- PC version
To be teleported into the arena AND out of the arena, you MUST be dismounted.
- If you are mounted when you teleport into the arena, you teleport and dismount
- If you are mounted when you teleport out of the arena, you teleport and dismount
- Xbox version
- If you are mounted when you teleport into the arena, you teleport and dismount.
- If you are mounted when you teleport out of the arena, you don't die, but your dino gains a large amount of torpor.
Extinction and Genesis [ ]
Teleportation to the Titan summoned area or bosses in Genesis does not require you to dismount.
Equipment and Structure Restrictions [ ]
- No structures may be placed in the arenas. So avoid forming plans that revolve on building. If you attempt to place anything, the message "No ground or snap point available" will be displayed.
- Grappling hooks may be taken into the arena, but once equipped in a crossbow they cannot be fired. (May be related to why Thylacoleo does not teleport into arena.)
- Quetzal, while itself can be warped into Manticore Arena, may not warp inside if it is wearing a
 Platform saddle with at least one structure.
- All Tek gears and Tek saddles are banned from mainly the island Boss arena (Excluding Tek Cave/Overseer Arena) and Manticore Arena, and attempting to wear it inside when entering will either force unequip it, or drop at where the boss was summoned)
Item Losses [ ]
- You will lose summon items and dinos only upon running out of time or dying within the arena. Similarly, if no survivor are inside the arena when the portal is pulling dinos in, all the dinosaurs will die immediately. This excludes the arena at Extinction and Genesis: Part 2.
Multiples changes [ ]
- Due to the harsh consequences of a failed boss fight (see bullet point above), it is extremely advisable to prepare before attempting a boss fight. Watching online videos of other ARK players completing the Boss fight is a good way to elaborate your strategy in advance. However, there have been a lot of changes to the Boss Arenas during the development of the game, so ensure you are watching videos recorded after the last patch changing Boss Arenas. Also Singleplayer Bosses are weaker than Multiplayer Bosses, but never underestimate the Bosses.
Version History [ ]
| Version | Release | Changes |
|---|---|---|
| 271.0 | 26 September 2017 | * Fixed some boss exploits. (aka Dragon and Manticore barely land in the Arena) |
| 264.2 | 29 July 2017 | * Fixed boss scaling for multiplayer sessions (approximately 67% easier) |
| 264.0 | 22 July 2017 | * Final boss balance for Broodmother/Megapithecus/Dragon bosses in single-player. |
| 263.0 | 17 July 2017 | * Fixed a case where the Gorilla Boss would float and walk backwards, unable to attack anything. * Additional damage and health adjustments to the Dragon, Megapithecus, and TheCenter bosses. |
| 262.0 | 14 July 2017 | * Dragon boss no longer present on TheCenter. * Center Boss damage reduced by 33% versus TheIsland bosses. * Fixed Bosses so they no longer have random levels, but will scale correctly on game and server difficulty. |
| 258.71 | 10 June 2017 | * Rebalanced Broodmother and streamlined Broodmother Arena. |
| 258.45 | 4 June 2017 | * Fixed some Boss Arena collisions |
| 258.42 | 3 June 2017 | * Fixed collisions on Gorilla and Dragon arenas |
| 258.2 | 31 May 2017 | * Fixed Gorilla Boss arena boundary |
| Boss Arenas | |
|---|---|
| Displayed are the Boss Arenas for The Island, The Center, Scorched Earth, Ragnarok, Aberration, Extinction, and Valguero. | |
| The Island | Broodmother Arena • Megapithecus Arena • Dragon Arena • Overseer Arena |
| The Center | The Center Arena |
| Scorched Earth | Manticore Arena |
| Ragnarok | Ragnarok Arena |
| Aberration | Rockwell Arena |
| Extinction | Desert Titan Arena • Ice Titan Arena • Forest Titan Arena • King Titan Arena |
| Valguero | Forsaken Oasis |
| Genesis: Part 1 | Moeder Arena • System Root |
| Crystal Isles | Crystal Wyvern Queen Arena |
| Locations | |
|---|---|
| Displayed are the locations for The Island. For locations found in DLCs, please see The Center, Scorched Earth, Ragnarok, Aberration, Extinction, Valguero, Genesis: Part 1, Crystal Isles, Genesis: Part 2, or Lost Island. | |
| Maps | Resource Map • Explorer Map • Creature Spawn Map |
| Plains | The Eastern Plains • The Frigid Plains • The Western Plains |
| Islands | Cragg's Island • Southern Islets • South Haven • The Dead Island • The Footpaw |
| Mountains | Far's Peak • The Frozen Tooth • The Grand Hills • The Red Peak • Volcano • Weathertop • Whitesky Peak • Winter's Mouth |
| Beaches | Northeast Shores • Northern Shores • Northwest Shores • Southeastern Shores • The Southeast Shores • The Western Approach • The Western Coast |
| Forests | Southern Jungle • The Eastern Forest • The Redwood Forests |
| Caves | Central Cave • Lava Cave • Lower South Cave • North East Cave • North West Cave • Snow Cave • Swamp Cave • Tek Cave • The Caverns of Lost Faith • The Caverns of Lost Hope • Upper South Cave |
| Arenas | Broodmother Arena • Dragon Arena • Megapithecus Arena • Overseer Arena |
| Other | Deep Ocean • Drayo's Cove • Ice Wyrm's Belly • The Belly of the Beast • The Deep Island • The Descent • The Frigid Deep • The Frozen Fang • The Frozen Maw • The Frozen Sea • The Gulch of Lamentation • The Hidden Lake • The Maw • The Shadow Road • The Throat of Borea • The Throat of Flame • The Writhing Swamps • Smuggler's Pass • Volcanic Maw |
| Locations in the DLC: The Center | |
|---|---|
| Displayed are the locations for The Center. For locations on other maps, please see The Island, Scorched Earth, Ragnarok, Aberration, Extinction, Valguero, Genesis: Part 1, Crystal Isles, Genesis: Part 2, or Lost Island. | |
| Maps | Resource Map • Explorer Map • Creature Spawn Map |
| Plains | Snowy Grasslands |
| Islands | Eastern Islets • Half-Burnt Island • Jungle Mid Beach • Jungle North Beach • Jungle South Beach • Lava Biome • Lava Biome High • Scorched Island • Secluded Island • Skull Island • The Center (Floating Island) • Tropical Island North • Tropical Island South |
| Mountains | Edge of the World • Snowy Mountain (North, South) • Western Cliffs |
| Forests | Jungle Mid • Jungle North • Jungle South • Redwood Biome |
| Caves | Cliffside Cavern • Jungle Cave • Lava Oasis Cave • LavaCave • North Ice Cave • South Ice Cave • The Center Cave • Underground World |
| Arenas | The Center Arena |
| Other | DeepOcean • Eastern Trench • Jumping Puzzle • Ocean Under Center • Penguin Pond • Swamp • The Bridge • Underwater Dome (East, South) • Underworld Ocean |
| Locations in the DLC: Scorched Earth | |
|---|---|
| Displayed are the locations for Scorched Earth. For other locations, please see The Island, The Center, Ragnarok, Aberration, Extinction, Valguero, Genesis: Part 1, Crystal Isles, Genesis: Part 2, or Lost Island. | |
| Maps | Resource Map • Explorer Map • Creature Spawn Map |
| Badlands | Eastern Badlands • Northern East Badlands • Southern East Badlands |
| Canyons | Central Canyons • Northern Canyons • Southern East Canyons |
| Dunes | Central Dunes • Eastern Dunes • Northern Dunes • Northern East Dunes • Northern West Dunes • Oasis Dunes • Southern Dunes • Southern West Dunes • South East Dunes • Western Dunes |
| High Desert | Central High Desert • Northern East High Desert • Northern High Desert • Northern West High Desert • Southern East High Desert • Southern High Desert • Southern West High Desert • Western High Desert |
| Low Desert | Eastern Low Desert • Southern East Low Desert • Southern Low Desert |
| Oasis | Eastern Oasis • Northern West Oasis • Southern West Oasis |
| Mountains | Central Mountains • Northern Mountains • Northern Mountains Summit • Northern West Mountains • Southern East Mountains Summit • Southern Mountains • Southern West Mountains • Western Mountains |
| Caves | Grave of the Tyrants • Old Tunnels • Ruins of Nosti • World Scar |
| Arenas | Manticore Arena |
| Other | The Blasted Maw • Waterfall |
| Locations in the DLC: Ragnarok | |
|---|---|
| Displayed are the locations for Ragnarok. For locations on other maps, please see The Island, The Center, Scorched Earth, Aberration, Extinction, Valguero, Genesis: Part 1, Crystal Isles, Genesis: Part 2, or Lost Island. | |
| Maps | Resource Map • Explorer Map • Creature Spawn Map |
| Plains | Deathsands • Elysian Fields • Freyja Plains • Hidana • Highlands • Lower Highlands • Mejo Plains • Scotland • Slosher Slope • Upper Highlands • Volcano Plains • Western Highlands |
| Islands | Casun Islets • Rashaka Savanna |
| Mountains | Barnji Plateau • Blizzard Peak • Cliffs of Past • Cold Eye Ridge • Ebling plateaus • Fifer Plateaus • Heru ur Rise • Hibbert's Summit • JackKnife Glacier • Jinx Point • Little Snow Top • Maple Roost • MurderSnow • Murder Murder Snow • Perch of the Adventurer • Raven's Peak • Snow Peak • Thea Cliffs • The Greater Cliffs • The Ivory Crag • Thunder Peak • Timpanogos • Vegurs Chasm • Volcano Tippy Top • Wedlock Peak |
| Forests | Coastal Redwoods • Light Redwoods • Lower Redwoods • Oluf Jungle • Redwoods • Reta Forest • Ruinous Jungle • Snow Forest • The Deep Woods • Twoshuk Forest • Wyvern Forests |
| Ruins | Castle of the Swamp • Dawson's Bridge • Donovan Bridge • Highlands Lookout • Ivan's boats for less • Mine Shaft • Ruins of Etain • The Monkey's Puzzle |
| Caves | Arch Cave • Arch Crystal Cave • Bái Láng Cavern • Beaver Cave • Carnivorous Caverns • Central Canyon Cave • Dragon Breath Grotto • Fafnir's Cavern • Fallen Redwood Cave • Fifer Plateaus Cave • Glacier Hall • Hidana Cave • Hidden Cavern • Hidden Springs Cave • Ice Queen Nest • Jatheish Grotto • Kamaka Cave • Kuri Cave • Lair of The Mask • Metal Cave • Nataziel Spires Cave • Oluf Jungle Cave • Opal Cave • Pirate Cave • Scotland Crystal Cave • Scotland Waterfall Cave • Skellet Canyon Cave • South Island Cave • Snow Cave • The Forbidden Grotto • The Water Tunnels • Volcano Tunnel • WhiteDove Falls Cave • Wyvern Cave |
| Dungeons | Jungle Dungeon • Frozen Dungeon • Life's Labyrinth |
| Arenas | Ice Queen Labyrinth • Lava Elemental Arena • Ragnarok Arena |
| Other | Ake Ridge • Asgeir Waters • Balder's Pass • Bay of Hope • Causeway of the Ancients • Costal Rise • Central Canyon • Crumbling Slopes • Cursed Shores • Dag Rock Valley • Dark Deeps • Dragonmalte Trench • Edric Rapids • Egil Throughway • Elysian Flow • Erlend Rocks • Frozen Falls Pass • Glass Lake • Forbidden Valley • Hidden Springs • Highland Sands • Highlands Bay • Honor Ridge • Hot Springs • Ice Lake • Ingrids Pass • Jarl River • Joannas Inlet • Kamaka Ice Lake • Katan Falls • Knuffel Lake • Lake Voges • Lone Pillar • Lower Craigs • Lowlands • Meshky's Homestead • Mithrim's Fall • Monkeyheim • Nataziel Spires • Northern Homestead • Northern Swamp • Olga Beach • Oscari Pass • Pelagornis Bay • Pepper's Reef • Sands of Change • Slope of the Gods • Snow • SnowCherub Lake • Southern Flats • Spear of the Gods • Strip of the Bold • SW • Swamp • Swamp of the Damned • Taosst Creek • Test hot • The Ancients Tears • The Burning Mists • The Dark Waters • The Dead Bluffs • The Old River • The Passages • The Pit of Dreen • The Sacred Bluff • The Slopes • The Source • The Tunnels • The Tyrannogon • Titans Fall • Titans Rise • Twoshuk Bluff • Upper Dagmar Lake • Upper Hidana • Upper Pelagornis Bay • Vali Ridge • Vali's Earthfall • Viking Bay • Volcano Beach • Volcano UW • Waterwall of the Ancients • Whisker's Flats • WhiteDove Falls • Zelus Reef |
| Locations in the DLC: Aberration | |
|---|---|
| Displayed are the locations for Aberration. For locations on other maps, please see The Island, The Center, Scorched Earth, Ragnarok, Extinction, Valguero, Genesis: Part 1, Crystal Isles, Genesis: Part 2, or Lost Island. | |
| Maps | Resource Map • Explorer Map • Creature Spawn Map |
| Forests | Mushroom Forest • River Valley • Luminous Marshlands |
| Ruins | The Ancient Device • The Fallen Nexus • The Spine |
| Caves | Elemental Vault • Hidden Grotto • Old Railway Cave |
| Arenas | Rockwell Arena |
| Other | Crystalline Swamps • Element Falls • Hope's End • The Lost Roads • Halls of the Reaper • Halls of the Reaper Queen • The Grave of the Lost • The Overlook • The Surface (Northeast, Northwest, Southwest) |
| Unused | Teeming Caverns |
| Locations in the DLC: Extinction | |
|---|---|
| Displayed are the locations for Extinction. For locations on other maps, please see The Island, The Center, Scorched Earth, Ragnarok, Aberration, Valguero, Genesis: Part 1, Crystal Isles, Genesis: Part 2, or Lost Island. | |
| Maps | Resource Map • Explorer Map • Creature Spawn Map |
| Domes | Desert Dome • Snow Dome |
| Plains | Badlands • Giants Steppes • Hulterel Plains • Sulfur Fields • The lowlands • Wasteland |
| Ruins | Barracks • Beckette's Bridge • Beckette's Other Bridge • Bracken Institution • Camp Omega • Control Center • Control Room • Delta Tower • Diana Memorial Fountain • Dome Treatment • Exposed Dome • Fallen Tower • Fort Nova • Memorial • Memorial Park • Obelisk Park • Old Ruins • Relic Of The Past • Sanctuary • Sanctuary Obelisk • Sanctuary Park • Sanctuary Parkway • Santiago's Grave • Station • The UnderForest Ruins • Water Main |
| Mountains | Arid Steps • Carver Rock • Crater Pass • Eroded Pass • Forbidden Zone • Glaicer Pass • Grey Fist Mountain • Grip of Torment • Jagged Lookout • Loose Rock Ridge • Lower Spires • Mt. Bracken • Overpass • Picholm Mountain • The Gallanwell Pass • The Sweeping Spires • Spire Lookout • The Trench • Western Ramp • Wisp Vile Ridge |
| Caves | Crater Forest • The UnderForest |
| Dungeons | Desert Cave • Forest Cave • Ice Cave |
| Arenas | Desert Titan Arena • Forest Titan Arena • Ice Titan Arena • King Titan Arena |
| Other | Beckette's Falls • Blood Hollows • Corrupted Den • Corrupted Terminal • Crater Runoff • Crimson Falls • Crystal Falls • Crystal Path • Crystal River • Flodded Pond • Flooded Waterway • Frozen Approach • Frozen Falls • Frozen Grotto • Frozen Lake • Frozen Tundra • Geiser Falls • Geiser Springs • The Hopeless Ravine • Ice Tail River • Ivory Gulch • Lowlands Runnoff • Memorial Waterfront • Searing Springs • Secluded Lake • Sludge Basin • Spire River • Striker's Landing • Striker's Point • The Cassinese River • The Core • The Crater • The Frozen Lens • The Hideout • The Narrows • The Outlook • The Ribcage • Thundering Basin • Treatment Runnoff • Underbelly • Vile Straight |
| Locations in the DLC: Valguero | |
|---|---|
| Displayed are the locations for Valguero. For locations on other maps, please see The Island, The Center, Scorched Earth, Ragnarok, Aberration, Extinction, Genesis: Part 1, Crystal Isles, Genesis: Part 2, or Lost Island. | |
| Maps | Resource Map • Explorer Map • Spawn Map |
| Plains | Snow Desert • Tundra |
| Islands | The Island • The Maul |
| Mountains | Felsblock Plateau • Glacier Narrows • Grand Glacier • Highmountain • Icewall Plateau • Jungle Cliff Ridge • Skeleton Gorge • The Paradise • The Pillar • The Skyguard • The Twin Peaks • The White Cliffs • Weather Top |
| Valleys | Claw Valley • Felsblock Pass • Glacier Throughway • Green Canyon • The Valley |
| Forests | Boreal Forest • Jungle • Schwarzwald • The Redwoods |
| Water | Beaver Lake • Beaver Moore • Hidden Lake • The Dam (Boreal Forest, Redwoods) • The Falls • The Lake • The Moore • Tundra Crossing • Urwald Swamp |
| Ruins | Bergfestung • Forgotten City • The Farm • The Lost Temple • The Outpost • The Stronghold |
| Caves | The Abyss • The Emerald Forest • The Great Trench • The Lair • The Unknown |
| Arenas | Forsaken Oasis |
| Locations in the DLC: Genesis: Part 1 | |
|---|---|
| Displayed are the locations for Genesis: Part 1. For locations on other maps, please see The Island, The Center, Scorched Earth, Ragnarok, Aberration, Extinction, Valguero, Crystal Isles, Genesis: Part 2, or Lost Island. | |
| Maps | Resource Map • Explorer Map • Spawn Map |
| Plains | Arctic • East Arctic • Mid Arctic • West Arctic |
| Islands | Anvil • Candle Point • Family Isles • Island Skerry • Long Island • Secluded Atoll • Shielded Atoll • Tiny Isle |
| Mountains | Frozen Crags • Glacier Maker • Glacier Point • Smokestack • Volcano |
| Valleys | Northern Ice Canyons • Root Canyon • Southern Ice Canyons |
| Forests | Canopy • Dampwood • Obscured Forest • Silent Grove • Spire Taiga • Sunken Jungle • The Floating Forest • Titan Tree Undergrowth • Willow Way |
| Water | Fishing Lake • Helm's Reef • Ocean • Open Water • Sauna • Shallows • Sluceway • Swamp • Thawed Waterway • The Oasis • The Scar • The Trench • Under the Ice |
| Ruins | Collapsed Drill • Derelict Defense System • East Siphon • Excalibur • Frozen Warpgate • Paradise Lost • Northwest Siphon • Southwest Siphon • Thermal Generator • Treetop Village |
| Caves | Arch Mine • Darkwood Tunnel • Derelict Mine • Family Cave • Underpass • Volcanic Cave |
| Arenas | Moeder Arena • System Root |
| Other | Arkhan • Base of the Ancients • Big Brother • Boulder Bridge • Burning Arteries • Capital V • Charred Creak • Chonky Point • Crater Carrot • Dead Scar • Devo'ssa • Did you cheat? This is out of bounds • Exiled Titan • Eye of Horus • Fallen Titan • Fetid Pools • Flame Lake • Flotsam • Goalposts • Greater Ophelia • Grog • Hades Reservoir • Hammer • High Orbit • High Point • It's Cold Up Here • Itty Bitty • Jetsam • Kashaw • Keyleth • Lantern Road • Lavaclaw Flow • Leaky Cauldron • Leap of Faith • Lesser Ophelia • Levi's Chair • Little Sister • Load Bearers • Lower Vecna • Magma Spring • Middle Vecna • Nana's Stump • No Exit • Northern Windbreak • Oil Bog • Oil Well • Optic Nerve • Percy • Pike • Playground • Reconciliation • Respite • Rocky Rock • Sable Pools • Sailor's Rest • Scanlan • Scorch'n'Slide • Serpent Scales • Shards of Element Rock • Shortcut • Snowy Foothills • Southeast Lookout • Southern Windbreak • Spillway • Spire Rock • Spire Rock Trail • Squat Haven • Step Rock • Stone Battleship • Stone Scabbard • Terrarium • The Armory • The Babies • The Castoffs • The Falls • The Flotilla • The Loner • The Long Haul • The Ramp • The Stepstones • Toxic Mire • Trinket • Truth • Twin Watchers • Tyrannosaurs Rocks • Vecna's Realm • Upper Vecna • Vax'ildan • Vex'ahlia • Volatile Oil Field • Wandering Titans • Zahra • Zen Garden |
| Locations in the DLC: Crystal Isles | |
|---|---|
| Displayed are the locations for Crystal Isles. For locations on other maps, please see The Island, The Center, Scorched Earth, Ragnarok, Aberration, Extinction, Valguero, Genesis: Part 1, Genesis: Part 2, or Lost Island. | |
| Maps | Resource Map • Explorer Map • Spawn Map |
| Plains | Desert Savannah • Halcyon Plains • LowerHalcyon Plains • Midland Savannah |
| Islands | Apotheosis • Eldritch Isle • Northern Islands |
| Mountains | Copper Peaks |
| Valleys | Crook's Canyon • The Great Valley |
| Forests | The Great Forest • The Great Forest North |
| Water | Central Oasis • Central River • Cooling Pond |
| Caves | Desert Wyvern Hive |
| Arenas | Crystal Wyvern Queen Arena |
| Other | Bloodfall's Hallow • Emberfall • Fire Swamp • Northland • The Tropics • The Wetlands • The White Shoals • Tundrafalls • Wander's End • Wander's Hope • Wander's Tail |
| Gameplay Mechanics | |||||||||||||||
|---|---|---|---|---|---|---|---|---|---|---|---|---|---|---|---|
| Games/Franchises | ARK: Survival Evolved (Mobile) • PixARK • ARK Park • ATLAS • ARK 2 | ||||||||||||||
| Building & Development | Building • Building Guides • Farming • Cooking • Electricity • Item Quality • Spoilage • Blueprints • Inventory • Tribes • Spawn Locations • Leveling • Creative Mode | ||||||||||||||
| Items | Armor • Consumables • Resources • Structures • Weapons | ||||||||||||||
| Environment | Game Modes • Single Player • Survival of the Fittest • Game Persistence • Environmental • Difficulty | ||||||||||||||
| Exploring |
| ||||||||||||||
| Character |
| ||||||||||||||
| Creatures |
| ||||||||||||||
| Miscellaneous | Achievements • Chat • DLCs • Weapon Mechanics • Stasis • Raptor Claus • HLN-A • Chibi-Pets | ||||||||||||||
Source: https://ark.fandom.com/wiki/Boss_Arenas
Enregistrer un commentaire for "What to Take to Beat Valguero Boss Easy"